

A steel beam may offer a convenient suspension point for pipework, yet the clamp connecting a hanger to that beam needs more attention than its small size suggests. An incorrect flange fit, unsuitable load direction or crowded mounting position can turn a straightforward installation into a site delay. Contractors working on fire protection, mechanical services and industrial piping should review the beam and hanger layout before ordering hardware. This article explains the checks that matter when installing beam clamps on structural steel, with particular attention to flange condition, connection geometry and the information buyers should obtain for the selected clamp model.
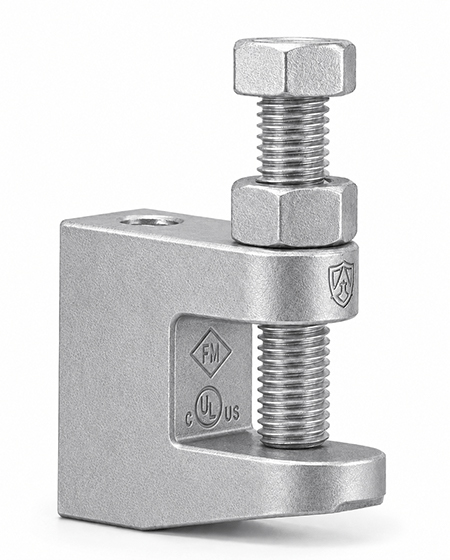
What Should Contractors Check on the Steel Beam Before Installation?
Start at the actual attachment point, not the clamp catalogue. A drawing may show a beam without revealing its flange shape, surface condition or the clearance left after other trades install their services. Record the supporting member type and compare the as-built arrangement with the approved support drawings.
Does the Flange Provide a Suitable Gripping Surface?
Check the flange thickness, edge shape and accessible depth against the selected clamp’s documented range. Look for tapered or irregular flange surfaces, welds, stiffeners and coatings that could interfere with seating. A clamp must bear against the intended surfaces rather than rest on a rounded edge or a nearby weld. Where the steelwork has been modified or access is restricted, ask the project engineer to review an alternative attachment point before work proceeds.
Do not assume that a clamp fitting one steel beam will fit every beam in the same building. The flange on a secondary support member may differ substantially from the flange of the main structural beam.
How Can Contractors Confirm the Clamp and Hanger Connection Match?
A secure grip on the steel is only one half of the connection. The opposite side must also accept the intended threaded rod or other support fitting, with enough space to assemble and inspect it.
Which Dimensions and Load Details Belong on the Purchase Check?
Compare the clamp’s approved connection size, mating thread, hanger orientation and manufacturer-defined load rating with the support schedule. Ask for the current product drawing and installation instructions for the exact order code, rather than copying dimensions from a visually similar model. Check whether the support will experience vertical, angled or other loading, because the allowable arrangement may differ. A beam clamp intended for stationary pipe support should not be treated as a lifting or rigging anchor.
The manufacturer lists Beam Clamp RL1 in its seismic-bracket product catalogue, while the separately documented Beam Clamp RL2 has its own connection sizes and material specifications. These should not be assumed to be interchangeable: request RL1-specific dimensions, load data and installation instructions before approval.
Which Site Conditions Can Cause Beam Clamp Installation Problems?
Even a correctly specified clamp may be awkward to fit if the intended location is blocked. A short site survey helps the contractor distinguish a product mismatch from a sequencing or access problem.
What Should Be Checked Around the Attachment Point?
Verify room for the clamp body, tightening tools, hanger rod and any locking device required by the product instructions. Look above and below the flange for cable trays, ducts, sprinkler branches and ceiling supports. The finished hanger should not twist the clamp or place the suspended pipe outside its approved support line. Inspect steel coatings and any project restrictions on drilling, welding or modifying the structural member.
Where services are tightly packed, mark each planned clamp position before material delivery. This allows the engineering and installation teams to resolve clashes without substituting an unapproved connector during the final shift.
How Should Contractors Install and Inspect the Clamp on Site?
Follow the instructions supplied for the specific clamp and the approved project drawings. A general installation checklist is useful, but it cannot replace a product-specific procedure or an engineered load check.
What Makes a Trial Installation Worthwhile?
On a representative beam, confirm that the clamp seats squarely, the fixing or set screw engages as intended, and the connected hanger remains aligned. Use the tightening method and torque specified for that exact product; do not borrow torque values from another beam clamp. Check that any required locknut, retaining feature or other hardware is present. The final inspection should include the beam contact point, the hanger connection and the clearance needed for future maintenance.
Before repeating the installation across a large floor, document the accepted arrangement with a marked drawing or site photograph. A common reference helps multiple crews install the same connection consistently.
What Should Buyers Confirm Before Ordering Beam Clamps in Quantity?
For a warehouse or commercial fit-out, hundreds of seemingly identical fixing points can conceal several beam profiles and support loads. Ordering one clamp for the entire project without checking those differences invites substitutions and return shipments.
How Can an Order Schedule Reduce Site Rework?
Group the required units by beam profile, connection size, support type and installation environment. Obtain the current RL1 product datasheet, permitted load arrangement, finish options, required fasteners and any project-requested approval documents from the supplier. Confirm the precise order code and sample fit before releasing the full quantity. If the schedule includes seismic supports, use the approved assembly design rather than assuming an ordinary pipe hanger clamp is automatically suitable for bracing loads.
For a broader range of support hardware, review Aquabarrier’s seismic bracket components. Its existing article on beam clamps and lifting beam clamps also explains why similarly named fittings must be selected for their actual intended use.
Why Work With Aquabarrier on Beam Clamp Procurement?
Aquabarrier lists Beam Clamp RL1 among its support and hanger products and offers related pipe-support and structural-connection components. Contractors can use the company’s product range as a starting point when coordinating procurement for building-services work. For a specific RL1 installation, request the model’s current technical sheet, connection dimensions, approved loading information and fitting instructions before placing an order.
Conclusion
Successful beam clamp installation begins with the steelwork. Contractors should examine flange geometry and condition, verify that the chosen clamp matches the intended hanger and load, and confirm that the installation can be completed and inspected in the available space. A trial fitting and model-specific documentation are particularly important before bulk procurement. These checks help keep pipe supports aligned with the approved project design instead of relying on visual similarity between different beam clamp products.
FAQs
Can a beam clamp be fitted to any steel beam flange?
No. Flange thickness, shape, available gripping depth and the condition of the steel must match the clamp’s documented installation range. The supporting structure also needs approval for the proposed load.
Can contractors use a beam clamp as a lifting point?
Only when the exact product is expressly designed and rated for lifting under the intended conditions. A clamp sold for pipe support should not be substituted for certified lifting hardware.
What should a buyer request for Beam Clamp RL1?
Request the current RL1 drawing, connection size, allowable load information, installation instructions, finish options and relevant approvals for the exact variant. Do not substitute RL2 specifications for RL1.


